Showing posts with label Recipes. Show all posts

Monday, April 1, 2013

Easy & delish Easter cupcakes from a box! (What?!?)

GASP!!! Yes, I didn't miss-title my post.  I love baking from scratch, but life gets busy and sometimes that is just not feasible.  This Easter was my time to be busy.  I wanted to make some cute cupcakes, but did not have the time to start all the way from the beginning.  I decided to make some from the box...BUT, I always change it up some to make the "from the box" cupcakes taste less like they are "from a box".

When I am using a box for a cake or cupcakes I always change two things:

** Replace the water for milk
** Add an extra egg

By doing these two simple changes, it makes the cake moister and more fluffy.  In addition, you can replace the oil with apple sauce, but if you do that, I would recommend not replacing it entirely.  Keep at least 2 tablespoons of the oil.  This will help bind the batter and not make it too heavy.

 
Using the changes I stated above, mix the batter together either by hand or with an electric mixer.  Make sure to scrape the sides and the bottom so you don't end up with any dry chunks (yuck).
 
 
Normally, you fill the cupcakes 1/2- 2/3 full to make 24.  This time, I didn't want so many since we were having a smaller dinner so I filled them a bit fuller and made only 15.
* note: three year old helper is optional ;)
In my oven, 22 minutes is the perfect amount of time for cupcakes.  Remember to rotate the pans half way through so ensure even cooking!
 
 
Now for the decorating!
 
This is SO easy.  You will need Peeps (I picked bunnies), toothpicks, frosting and green candy sprinkles.


Frost the cupcakes, sprinkle the green sugar on top.  I had two shades of green so I used both.  Then stick a toothpick half way through the Peep and stick in the cupcake!
Umm, done :)
 
You could use colored coconut or green frosting as an alternative.
These were super easy and a BIG hit with the kids!  I will definitely be making them again next year.
 
Happy baking!

Saturday, March 30, 2013

Bunny Bottoms!! {recipe and tutorial}


Aren't these the cutest?? I made a small batch of these today for Easter and they are very simple to do.  Slightly messy, but pretty easy.

To make these, you will need:
- nilla wafers
- mini marshmallows
- meltable chocolate
- vegetable shortening
- wax paper
- mini squeeze bottle or baby syringe (see below)
- microwavable bowl
- tray
note: Blue from Blue's Clues is optional :)
 
Set out your cookies and mallows.  Roll the mallows quickly in your hand to make them more "round" and bunny tail like.
 
Normally, I buy the Wilton's candy melts but I didn't have time to get over there so I bought the Fry's kind.  It works well, but costs a bit more and only comes in chocolate or white chocolate.  Since we are having a small Easter and I was making two other desserts, I only made 20 chocolate bunny bottoms. I used half the large block.
 
The secret to getting smooth and easily dippable chocolate is vegetable shortening.  I add a spoonful to the chocolate as it's melting.  Follow the directions on the package and melt your chocolate.
 
 
Set out the wax paper on the cookie sheet and using your mini-squeeze bottle or a baby medicine syringe to make the head and ears.  You have to work fast before the chocolate sets.  Make 3 or 4 heads and ears at a time.
 
Dip the cookie in the chocolate and use a fork to get it out.  Shake it some to get the extra chocolate off.  Place the body on the head while everything is still liquid.  Place a mini mallow on the bottom as the tail!
 
Cute!! If you drip the chocolate, use some q-tips to clean it up.
 
Place the tray in the fridge to set up.  They will harden in about 15 minutes and can easily be peeled off of the wax paper.
 
 
Place them on your table or in your bunny's baskets for Easter.  I am going to just set out a small tray of them for the kiddies to snack on.
 
What's cuter than a Bunny Bottom?!?  Not much!
 
Happy Easter everyone!

Monday, February 18, 2013

What's for dinner? {Slow cooker shredded chicken}

Spoiler alert!!!  I can get lazy at times...like lots of times!  As I was categorizing my blog posts the other day, I realized I am seriously lacking in the recipe department!!  Is that because I have been SO lazy lately, and haven't been trying new recipes?? Probably!  This made me remember that I have been wanting to rate some Pinterest recipes and share them with you all.
 
For my introductory "What's for dinner" post, I will share what I made for dinner earlier tonight, Shredded Chicken Sandwiches in the crock pot.
 
This was the original link:
 
I pinned it because it looked yummy.  I've had some chicken in the fridge for a few days and needed to make something with it but was feeling...wait for it....LAZY!  So I wanted to make something in the crock pot and since I still have lots of left over buns from Hannah's party I figured shredded chicken.
 
 
I modified it some to turn it into shredded chicken instead of beef.
 
Shredded Chicken Sandwiches in the Crock Pot
3 chicken breasts
1 envelope Lipton onion soup mix
1/2 c ketchup
1/3 c brown sugar
1/4 c. chicken stock
1/2 t dried parsley
1/4 t. garlic powder
pepper to taste
 
Mix all the ingredients, except the chicken and pepper, in the crock pot.  Sprinkle the chicken with the pepper and place in the crock pot.


Cook on LOW for 6 hours.  Shred the chicken with two forks after about 5 hours and then let look for another hour.

I put a smidge of ranch dressing on the bun and added some spring greens.  We had steamed broccoli with it.  Mr. Pea was at work so it was just me and the peas. There is plenty left over for him later and some more.
 
Overall results: 5 * rating
Easiness- ***** SUPER easy!!!  I put it all in the pot and did nothing else :)
Healthiness- **** I don't have an exact calorie count, but it was pretty healthy.  I didn't have an WW buns, which would've made it better.
Taste-  ***** Yum!  It had a nice, light flavor and it made the house smell good.
Cost- **** Depending on how much you pay for chicken, that it! The other ingredients I have on hand.
Best audience- family friendly
And the biggest test of all...did the peas eat it?!?!  YES they all ate a small sandwich!  Hooray!
 
Look for a new "What's for Dinner?" post every week.  This will help me to be less lazy and actually COOK more!
 
Happy {crock pot} cooking!


Monday, December 17, 2012

Easy holiday snack mix

As you know, I made the teachers wreaths for Christmas, but I needed something for Abby's "helper teachers" so I decided to make an easy but yummy snack mix.
 
To make this, you will need:
3c. Honey nut cheerios
3c. rice chex
2 c. mini pretzels**
two bags of holiday m and m's
1 c. peanuts, unshelled
2 bags of white chocolate chips
2T shortening
**note, when I bought this stuff, Fry's had some strange pretzel shortage and the only bag I could find was ONE bag of unsalted, but normally I would've chosen regular


I found these cute canisters at the dollar store and will used some green ribbon to tie around them.

Mix all the ingredients together, except the chocolate and shortening, in a large bowl or pot.


Melt the chocolate in the microwave and when it's almost done, add the shortening and mix it in.  This will help thin the chocolate.
Stir in the chocolate into the snack mix and let cool on a large piece of parchment paper.  Now, when I made mine, I mis-judged how much I would need to fill the containers, so I had doubled the original recipe.  I had TONS left over!  Ooops.

I filled the four jars for Abby's teachers and will have her hand write hands when she gets home from school.
 
What did I do with all my leftovers?!?  Well, I will take them to the preschool, and let those lovely ladies share it.  I wish I had more cute jars, but I don't, so this container will have to do :)
 
 
This snack mix probably took me 20 minutes to make from start to finish.  It is also fairy inexpensive to make so it's nice for when you have to make gifts in bulk.
 
I will be delivering all my gifts tomorrow, so hopefully everyone will like them!


Friday, November 30, 2012

Lazy mommy suppers

Do you ever feel this way??  I totally do, every single day.  Here's a secret: I don't really like cooking.  I love eating, just not cooking.  Two reasons 1. I am tired and 2. my kids wont eat.  It's very discouraging to make a delicious, home cooked, from scratch meal, just to have three peas give you this face:

That's the "I'm not eating this sh*t, no matter how long you make me sit here" face.  Thanks kids!  I appreciate your willingness to try new thing! {grrrrrr} 

I plan my meals out for a month, in pencil, so I can change as needed.  I sprinkle some crock pot meals, lots of pasta dishes, some family favorites, some new dishes and then some "lazy mom supper".  A lazy mom supper is just that: I'm lazy, don't feel like cooking, so let's just make something that I know everyone will eat and call it a day.  A lazy mom supper preferably will be prepared and served in less than 15 minutes, 20 min max.  A lazy mom supper is also not take out.  With three kids, take out is usually more trouble than it's worth and expensive.  Sure, I'll grab a pizza every once in a while, but lately since all our extra money is being diverted to Christmas, I'm trying to do less of that.  I don't make a lazy mom supper when Mr. Pea is home, he usually likes a full meal.  Lastly, I will pair each lazy mom supper with a fruit and veggie and serve with milk; makes it healthier ;)

*Please note, a crock pot meal, to me, doesn't classify as a lazy mom supper because I would've had to been thinking of dinner, WAY earlier, and I don't do that when I am lazy.

Here are my top 10 lazy mom suppers. 

1. BREAKFAST for dinner!  Yummy, many variations here- pancakes, french toast, waffles...my kids will eat them all!  Frozen or homemade, each takes just a few minutes.

2. Pizza eggs- on the same theme as breakfast, but eggs are the main piece.  After the eggs are done cooking, sprinkle some mozzarella cheese and mini-pepperonis in them, serve with toast.

3. Soup and toast

4. Sandwiches, any variety.  Want to spice it up??  Put that crap on a stick, my kids will eat ANYTHING on a stick! 

5. BLT.  Different than a "sandwich" since you have to cook the bacon! 

6. Crescent dogs: hot dogs rolled in an uncooked crescent roll, bake for directed time.  Can be served with french fries or tater tots.

7. Pizza rolls: just like the crescent dog but with pizza!  Roll each with cheese and pepperonis.

8. Bagel or english muffin pizzas

9. Baked mac and cheese cups: make a basic cheese sauce (make a rue, which is butter and flour, cook till golden, 2-3 minutes, add in milk, salt, pepper, turn heat off, add in shredded cheese, mix till smooth, can also add in some chicken stock to thin) pour over cooked noodles, bake in greased muffin cups for 10 mins.  If your kids are adventurous you can sprinkle some bread crumbs on the top before they bake. **this one may take 25 min, but they are really good!

10. Pasta.  Make with jarred sauce, butter and parm cheese, cheese sauce (see above), or a lemon sauce (chicken stock, garlic, lemon zest, lemon juice, a bit of olive oil, salt, pepper)  The lemon sauce is good and really only takes a few more minutes.  It does take a min or two to chop the garlic, so you can use the food processor like I do, or if you are REALLY lazy, just use garlic powder! :)  Can serve with garlic bread or bread and butter.

Ok, so there you have it.  My top lazy mom dinners.  What are your favorites???  Share with me below!  One can never have too many lazy mom meals up her sleeve :)

Friday, November 16, 2012

A delicious bean dip recipe

Ok, so I have some friends coming over in a few minutes to craft and celebrate my birthday, so I have about 5 minutes to blog!  My friend Wendy is making some delicious homemade tortilla chips, guacamole and bringing LOTS of margaritas, so I am making a quick bean dip.  Here is my recipe:

2 cans refried beans
1 c sour cream
1 8oz package of cream cheese (softened)
1 packet of taco seasonings
2 cups of Mexican blend cheese

Preheat the oven to 350.  Mix all the ingredients together and place in a baking pan.  Cover with the cheese.  Bake for 25-30 min and serve hot.  YUM.  It's good :)

Now, to get ready for my crafting/margarita celebration!

Saturday, November 3, 2012

Cupcakes, cake pops and parties, oh my!!

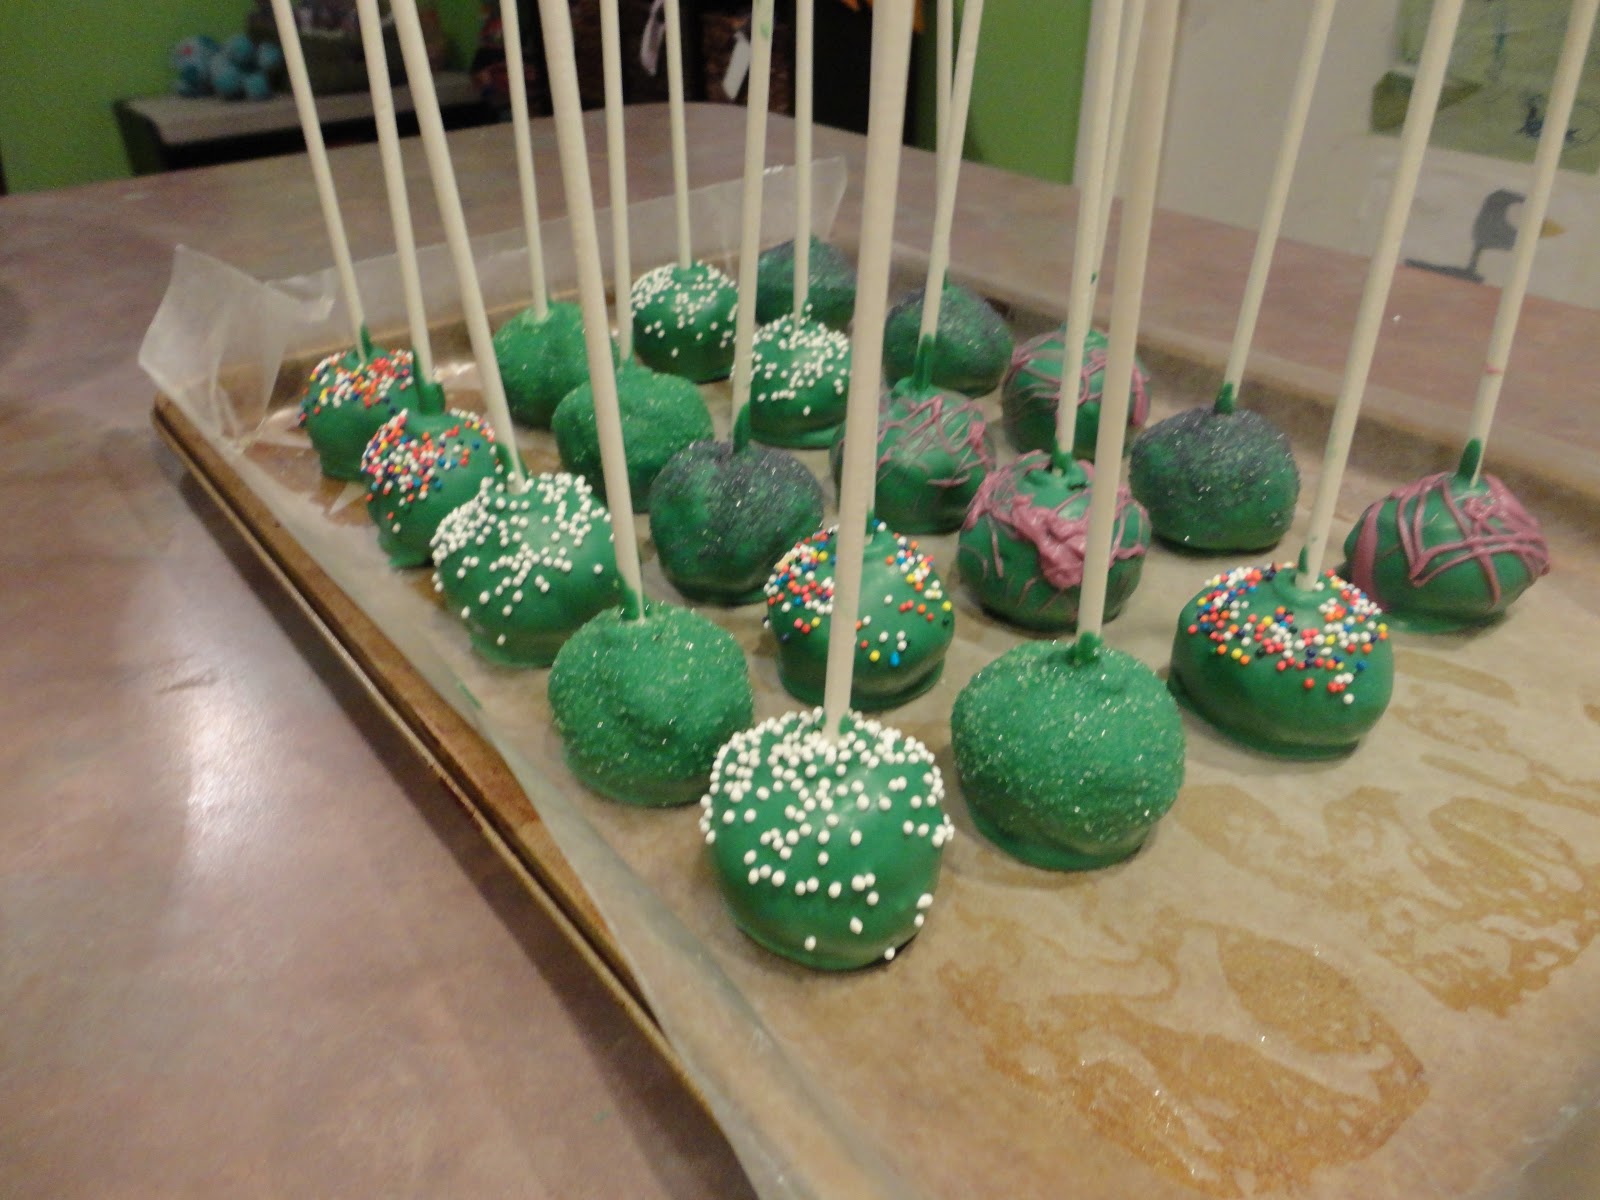
Abby and Jacob's birthday's are a week apart in November and I have always done a joint party since it makes my life so much easier.  I'm sure in the next year or two one or the other will request a solo party, but until then I try my best to make a party that that is suitable for both of them.  We've always had parties at home to save money and make it easier when they were littler, but this year we decided since there were so many kids between all their friends, that we would have it at Pump it Up!  For my Mass friends and fam, pump it up is an giant indoor jumpy place.  You probably have 100 awesome places like this there, but Tucson is lame and has one.  So since this place basically does all the set up and things I didn't want to do a "theme" like normal.  I decided just to do green and purple, Jacob and Abby's favorite colors.  I thought cupcakes and cake pops would be easier for littles to eat and I love making cake pops so any excuse to do make them, I'll jump at the chance! 

This is my basic vanilla cupcake recipe, it makes 20 cupcakes:
2 1/2 c flour
2 t baking powder
1/2 t baking soda
1/2 t salt
1/2 c milk
1/2 c veg oil
1 t vanilla extract
1 stick (8T) unsalted butter, room temp
1 c sugar
3 lg eggs

Whisk together the flour, baking powder, baking soda and salt and set aside.
Mix the milk, veg oil and vanilla in a small bowl or a 2 c measuring cup and set aside.
Cream the sugar and butter in your mixer until light and fluffy (abt 3 min.) and then add the eggs one at a time until all incorporated.
After the eggs are mixed in, add the flour mix and the milk mix in batched beginning and ending with the flour mix, making sure to scrape down the sides of the bowl as needed.
A nifty trick for putting your batter in the cupcake liners is to use a large plastic bag and clip the corner and pipe it into the liners.
Place your large plastic bag in a tall cup and pour it in... 
then take it out of the cup, clip the tip and pipe it in!
Nifty!
Bake the cupcakes at 350 degrees for 18-20 min.  Mine take exactly 19 minutes :) Let cool completely on a wire rack before frosting.
 
I have a few different frosting recipes I use but my Abby isn't a big fan of the classic butter cream recipe.  I think it's a bit too sweet for her, if that is even possible! So I decided to make a cross between a butter cream and a classic cream cheese frosting this time.  Hopefully she likes it :)
 
Butter cream/cream cheese frosting
1stick of butter, softened
4oz of cream cheese, softened
16 oz (one box) confectioners sugar
3 T milk
1 t vanilla extract
* I doubled this recipe because I made two batches of cupcakes. I had extra frosting too.
I colored half purple and half green.
 
I use the same bag trick for my pastry bag for the frosting.  Add some sprinkles and I'm done!
I also made cake pops in coordinating colors...
green for Jacob...
purple for Abby!
Sorry for my yucky wax paper photos...I have to let them set before I can display them properly :)
 
So tomorrow I will by pumping it up with my peas and enjoying my cleaning-free party. I'm sure it'll be one for the record books :)


Thursday, November 1, 2012

The best pumpkin roulade EVER!

Yup, I said it.  This recipe is SO good and pretty easy to make.  I make a few a year starting now and through Christmas.  It's a staple dessert along side my pies at Thanksgiving and Christmas.  This recipe is adapted from the original Canyon Ranch pumpkin cream cheese roulade (which is just so much more fancy-nancy than just a "roll"). My husband in his younger days worked there in the dining room along with about 90% of his friends, so I had to get a hold of the recipe since it was SO good. And the original recipe is actually described as "nutritious and delicious", seriously!  I'm sure if one followed the 1/18th of the roulade serving suggestion then you'd be all set. The recipe is fairly basic and probably uses stuff you already have in your pantry, except the canned pumpkin.  It requires very little technique to do.  So, when Abby's class was having a pumpkin tasting day, I knew what I was going to make.  I also knew that her teacher, who is pregnant, would also enjoy the leftovers :)  Here's my recipe!  Enjoy!

Pumpkin Cream Cheese Roulade
Cake:
1c canned pumpkin
1c sugar
2 eggs
2 egg whites
1 c plus 2 T all-purpose flour
1/4 t salt
1 1/2 t baking soda
1 1/2 t cinnamon

Filling:
1 c cream cheese (room temp)
2 T butter (room temp)
1 t vanilla extract
3/4 c powdered sugar

Preheat your oven to 375 degrees.  While the oven is heating up, prep your pan.  This recipe calls for using a 13"X20" cookie sheet with at least 1/2 in lip.  I just use my turkey roasting pan.  Spray with non stick spray and then line with wax paper and spray again.
Mix the pumpkin, sugar, eggs and egg whites.  Beat at medium speed for 3 min, then add the dry ingredients and mix well.  When you are done, you will have this deliciousness:
yum :)
 
 
Pour it into the pan and you will have to spread it around since it's such a thin cake. Bake for 12-14 min. When done, let cool for a few minutes in the pan and then invert onto a clean kitchen towel while still warm and peel off your wax paper.
To flip it, I like to take it out of the pan by holding the wax paper and then place it on a large towel, and then place another towel on top and flip it that way.
Ta-da! Pumpkin cake!  Now, while it's warm, roll the cake up IN THE TOWEL and let cool completely, seam side down.  I usually put it in the fridge.
 
When you are ready to make the filling, be sure that your cream cheese and butter are at room temp.  This should be the case almost all the time when you are baking, except when making crusts. I learned that interesting baking fact when I was taking "foods class" in high school.  It was a glorified home-ec...and the BEST class EVER! :) But I digress...
In your mixer, mix the filling ingredients well until they are light and fluffy, at least 4 minutes. Unroll your cake and pour the filling in the middle.  Spread around, keeping a larger amount in the center.
Then, roll your cake up with the filling inside.
You may need to redistribute the filling as you roll.
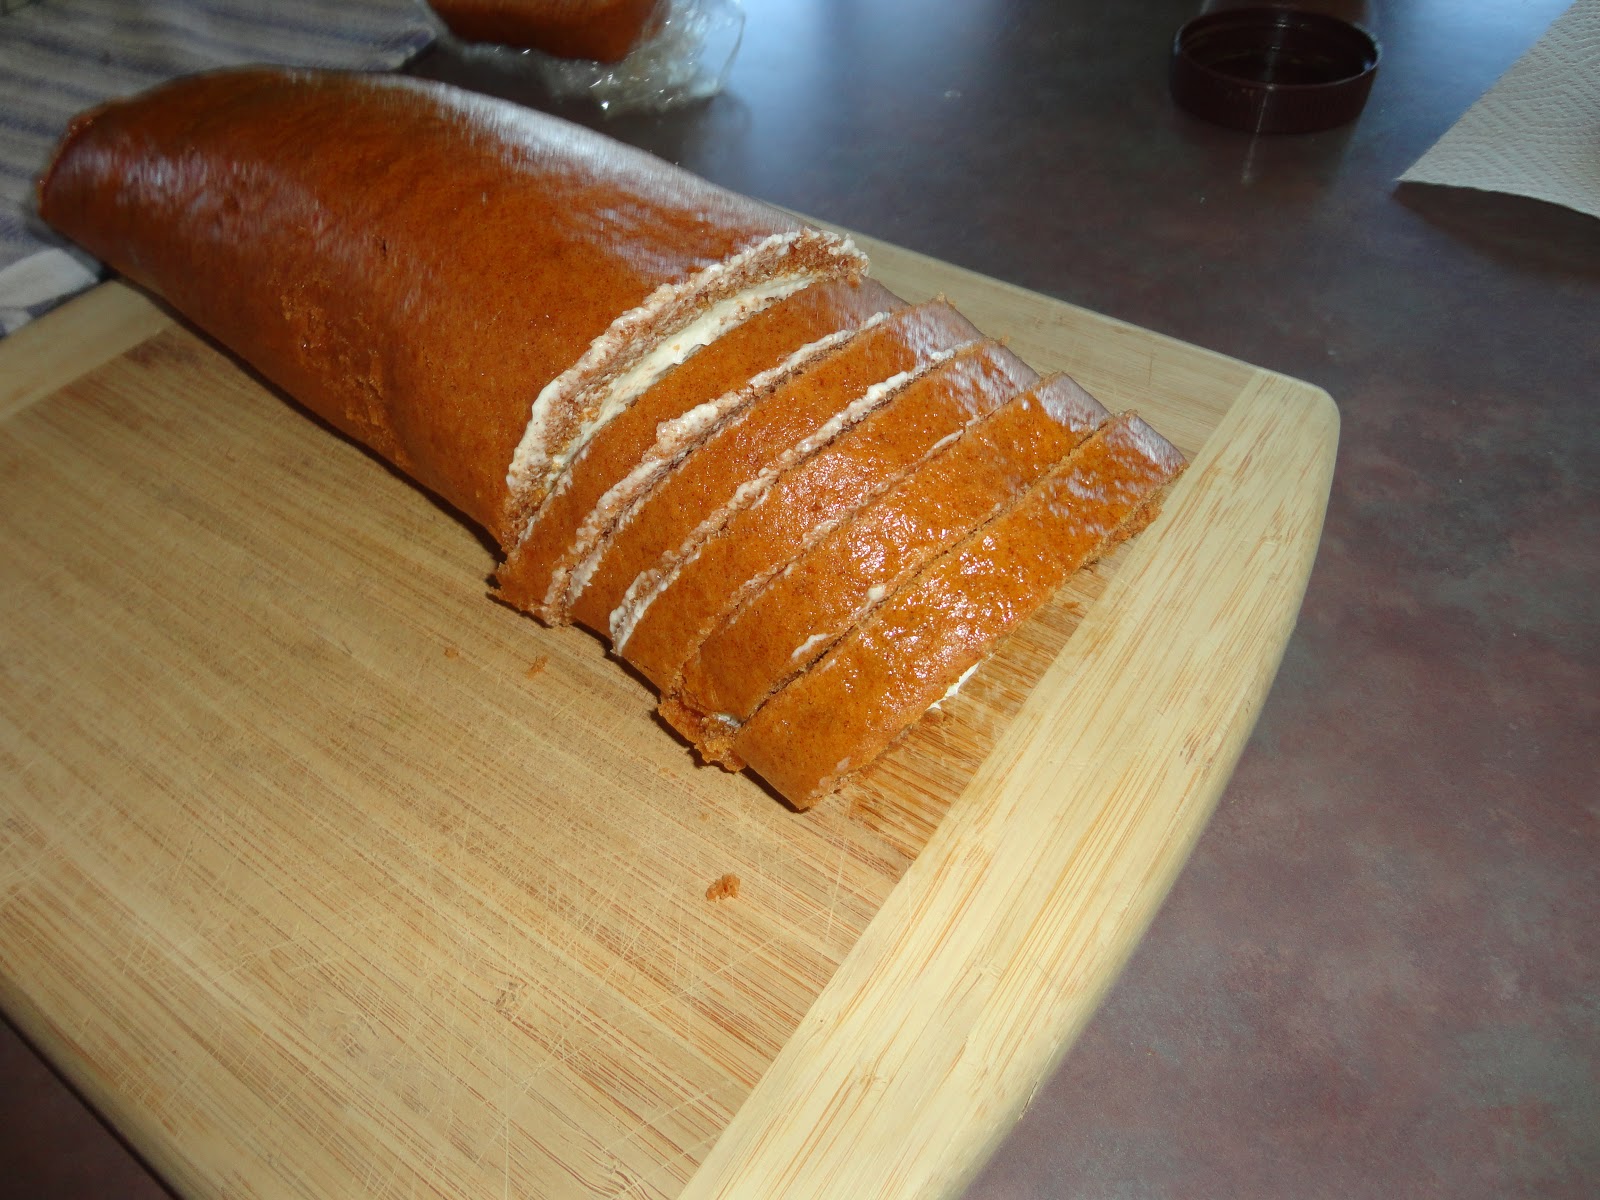
When it's rolled up, wrap in plastic wrap and let chill over night or at least for a few hours, seam side down.  After cooling, cut serve and enjoy!
yummers
The little ones sure enjoyed this treat!  It took everything I had to keep my husband away from the roll.  I promised him I'd make more :) I hope you try it out and enjoy it as much as we do!
 
Happy November all!!!


Monday, October 29, 2012

Easy pumpkin pop treats

I love helping out with my kid's school.  Not only do they go to a great school with amazing teachers, I find it fun to stay involved.  At the preschool, I am the lead parent coordinator, helping to plan events and projects with the teachers and then being the liaison to the parents.  At the school aged-level with Abby I am a member of the PTSA, volunteering my time to plan events and different activities.  One of my sole duties is being the teacher appreciation chair where I plan small monthly things for all the teachers and staff to show them how much we love them!  I usually center this around food, and more specifically, sweets. This month I was feeling halloweeny and felt like making some pops.  I decided to make chocolate-covered marshmallow pops decorated to look like little pumpkins.  It was quite easy to make them, but I had to make 100, so it did take some time.

To make these little cuties, you will need:
marshmallows
lollipop sticks
wilton's candy melts in orange
black icing
green ribbon
crisco
wax paper
*if you are packaging them, then you will need clear cello bags and ties

I like the Wilton's candy melts the best for when I am candy coating things like these and also cake pops.  They melt super easy and come in every color.  I usually buy them at Joann's with a coupon :) One bag of candy covered about 32 mallows.
Begin by following the directions on the package to melt the candy.  I use a medium glass bowl and use 50% power on the microwave. I let it go for about one minute and then stir, then stir every 30-45 seconds.  When it is just about all melted and smooth, add the secret ingredient:
A dollop of Crisco.  I KNOW!  Dieters look away! This is one of the only things I use Crisco in, but it really makes a difference and gets the candy to be thinner.  You can only add this to make it thinner, if you added milk or water or something else, the candy would seize up and would be unusable.  I add a spoonful in, stir well, and then micro for another 30-45 seconds till its thin and smooth.  Take out the mallows and the sticks.  Dip each stick in the candy and then stick in the mallow.  You can place them in a tray or plate to dry for a min or two.  This helps to keep the stick inside the mallow when you are dipping them.  You do this with cake pops or oreo pops too.
I did it in batches because I was making so many.  After they set for a few minutes, begin by dipping each pop in the chocolate.
I use a large spoon to help scoop the chocolate around it and by the top.  I usually spin and coat at the same time.
When it's coated, take it out and hold it like so (see my awesome photo above- no, I'm really terrible at taking these kind of pics, but you get the hint).  I tap where my hand and thumb meet while spinning the pop to help get an extra chocolate off of it.  Then, place on a wax paper covered tray to let dry.
Continue on until all the pops are covered then let set for a while.  I didn't feel like clearing my whole fridge out so I just left them on my kitchen table. This works fine, it just takes longer.  After they are all dry, make the faces.
I used this kind.  Its super easy to use and already made.  Wilton's makes some too and its just as easy.  Make a cute face on each pumpkin and then let dry, again!
Boo!!!
 
Boo, boo, boo, boo!
 
Cute, eh?  I'm not a perfectionist, much to your surprise, I am sure.  I don't care of all the faces aren't the same.  They are still super cute!
Once dry again, tie a little ribbon onto the pop.  I tied it up top and then pushed it down to the top of the pumpkin.
 
I individually bagged all the pops ready to pass out at school.  I WAS originally going to tag them all with cute little tags but by this point I was so tired, I just decided to make a little poem to hang up by the teacher's boxes so they would know where their delicious present came from.
Here's my awesome poem:
"Dearest teachers and staff-
Here's a little Halloween treat,
that'll be sure yummy to eat.
We appreciate all the hard work you do,
with only old pencils; none new.
So this little pumpkin is here to say,
thank you so much from the PTSA!"
 
I know, I know, super creative, right??  Ha, well, I don't think I'm becoming a professional poet anytime soon, but cute it certainly was.
Hopefully everyone likes their yummy and easy treat.  This was also very inexpensive to create and would make a great addition to a Halloween party or event. It would be fun to make them for different holidays and occasions as well.
Happy non-baking! :)