Showing posts with label DIY. Show all posts

Monday, April 29, 2013

Mission: Be a Better Mommy {part 2} CHORE CHARTS

A few days ago, I ranted on about how my kids can be a$$holes and that it was my fault.  Part one of my mission was the Toy Jail, to try and teach the peas the concept of responsibility and to eliminate the stress of me constantly having to ask, beg and plead them to pick up there toys. 
**UPDATE: So far, not a single toy has been sent to Toy Jail.  They have been picking up their items promptly.  I have seen some sabotage though!  Hannah had purposely tried to leave one of her sibling's toys out for them to go into toy jail!  What a brat!  I didn't fall for that trick! Hopefully, they will continue to pick up their crud on their own.

For many months, I had been wanting to make the kids chore charts.  FINALLY I finished them.  I was going to do a long tutorial on them, but they didn't quite turn out as nice as I would've liked, which is fine by me, but I don't want to share a long tutorial on something that doesn't look perfect!  I will give a quick synopsis on how I made them, though.

I wanted them to be magnetic, so I bought three thin sheets of magnetic metal (not all metal is magnetized so be sure to check!) and mod podged scrapbook paper on top,  I allowed the kids to pick what ever kind of paper they wanted.  I then bought three cheap frames and placed the metal inside of it, sans the glass.
 
I then glued the kids names and "to-do" and "all done" on them.  Afterwards, I made the chore magnets.  I used a thick foam board and glued the chore on the front and the magnet on the back.  I also mod podged the front of the chore "buttons" so they didn't get dirty.


The part that didn't quite turn out the way I wanted was that the paper kind of wrinkled some when the mod podge went on.  You can see it on Hannah's more because of the color.  The kids don't mind and I don't either.  I hung them in the hall way by the kid's rooms.
 
I made the chores be fairly basic, for now.  Some of them are the same for all three kids and then I have some other special chores that I rotate between the kids so they all take turns having a chance to do them.
 
The chores I chose for all three were:
make bed
clean room
put toys away
put clothes in dirty basket
homework & reading (just reading for Hannah)
 
The "special" chores are:
feed Biscuit
water inside plants
water outside plants
vacuum couch
get mail
sort laundry
dust living room
dust bedrooms
wipe down cabinets
 
So far, so GREAT with the chores.  The kids really like doing them and have been makng their beds without me even asking!  If they finish all their chores in a day, then they get to pick a reward for the next day, like stay up a few (and by a "few" I mean like 5) minutes later, a quarter for their piggy bank, extra tv/computer/phone time, or dessert after lunch. 
 
The end goal is for them to move their chores all on their own, with little intervention for me.  On our busier days, I haven't pushed them, but they are really taken to wanting to help out.  Hopefully I can keep up with it, so they will continue to be successful with them!
 
I want my kids to understand the meaning of "helping out" and to grow up to be well-rounded, kind people....and not selfish jerks.  This is a good step! :)  Don't want your kids to grow up to be jerks??  Make them help you around the house, it builds character.
 

Saturday, April 27, 2013

Mission: Be a Better Mommy series {part 1} TOY JAIL

Here's something you don't always here a mother say (but I'm sure most think from one time or another): My kids can be such a$$holes.  Seriously!  I mean, I love them to death, but honestly, they can be such little shits some times.  Their teacher's would say I was crazy since they are perfect little angels all day with them, but at home with me it's a different story.  They used to be so much nicer a few years ago: they listened more, almost always cleaned up after themselves, ate most of their food.  Now, they argue with me about everything, barely eat their dinner, demand dessert after every meal, and I have to practically scream at them to get them to pick up their crap. 

Don't get me wrong, I know kids who are WAAAAYYYYY worse than my kids, so I'm not complaining too much, but their behaviors have been less than desirable lately and it's time for me to fix it.  And by fit IT, I mean fix MYSELF.  Any parent that is having behavioral issues with their kids, whether it be major or minor, needs to look in the mirror because it is NOT the kid's fault; it's OURS.  Our kids are born ready to learn and soak up the world like a little sponge and how we parent directly correlates to their behavior and attitudes towards society.  There are a million types of discipline methods and I am not here to say what is best for your family.  I do know that I am not happy with how my kids have been acting so I am on a mission to try and fix it!

I have been trying to think about why my kid's behavior has changed and I have discovered two changes: one (and the more major one) is my lack of patience.  Blame it on being stuck at home with three kids day in and day out with very little time away, or just the daunting repetitiveness of all their demands.  Maybe it's the lack of adult time or all the driving and rusing around we have been doing.  Perhaps it's a combo of it all.  I love being a stay at home mama but it certainly isn't easy, but that's not a good reason for me to be slacking on my job.  I need to find more patience and find it NOW.  The second thing is my oldest daughter has been more trying than usual, and I know that comes with her getting older.  She is an amazingly smart and wonderful girl.  She is an awesome big sister and so helpful to me. She can also be a whiny brat and major pain in the you-know-what when she wants.  That's another issue for another time though.

Back to the mission at hand: being a better mommy.  Being a better mommy means not raising little shits that are going to be assholes when they grow up: not demand things from society, not understand that hard work pays off, not be spoiled brats and not just to "expect" things to be done for them.  This concept (and Pinterest, of course) is what sparked my first step on my mission.

I decided to finally make that awesome "toy ransom" box that I pinned AGES ago.  The concept behind the box is to stop all the asking, pleading, and in my house, yelling that comes along with trying to get your kids to pick up their things and put them away. 

The rules are simple:
- Mom sees a mess, gives the kids a warning to please pick them up and put them away.
- After a period of time, one that mom sees fit, if said toy(s) are still out, mom places toy in Toy Jail.
- In order for child to get their toy back, mom will chose a chore from the list for child to do.
- There are no re-picks, you get what you get.
- If it is a cleaning job with "spray" (like cleaning the front of the fridge) MOM sprays, because it's fun to spray and this chore isn't suppose to be fun!
- Once the chore is complete, child gets toy back.
- If there are unclaimed toys in the box after a week, they get donated.


Here is my box.  I found this cute little poem at Just Another Day in Paradise
 
My list of chores are:

Clean the tub
Pick up the dog poop
Rub Dad's feet for 5 minutes
Clean the potty
Clean the kitchen floor with a cloth

Wipe down the front of the fridge

Wipe down the garage door in the kitchen

Pick weeds in the backyard

Pay mom a quarter from your piggy bank

Brush Biscuit for 5 minutes

Clean the kitchen chairs

Do 25 jumping jacks

Clean your sibling’s room

Shake out the kitchen rugs

Shake out the kid’s bathroom rugs

Clean all the doorknobs

Wipe baseboards in kitchen

Wipe baseboards in living room

Wipe baseboards in hallway

The genius of this box is it's simplicity.  One warning, no yelling, begging, nagging. They don't clean it up? Into the box it goes!  Sure they may throw a temper tantrum but that doesn't bother me.  I am hoping that this box helps to bring back some of my patience because my blood wont boil so much when no one listens to me. Also, they were learn the all-important lessons of RESPONSIBILITY and ACCOUNTABILITY.
 
To go along with this "responsibility" lesson is the chore charts I made for my kids. I'll share those in my Mommy Mission, part 2 on Monday.
 
I don't know about you, but I cannot WAIT for the first kid to leave a toy out and I hope the chore is "pick up dog poop": that'll show them I mean business!

Monday, April 8, 2013

{DIY} Race bib holder

 
My fellow runner friend had one of these race bib holders at her house and I LOVED it!  Her husband got it off of Etsy and after searching for them, I found out they were anywhere in between $30- $40 which I really didn't think I should be spending.  So, being such a "crafty" person,  I decided to make one!
 
This project cost me less than $15 and a few hours to make...probably less time for someone that doesn't three kids running around.
 
To make this, you will need:
 
11x14 beveled edge wooden plaque (I got this at Joann's)
acrylic paint, any color you wish
small paint brush or foam brush
mod podge
scrapbook paper, any pattern you wish
hammer
large nail
level
2- small "c" hooks
4- large "c" hooks (sometimes referred to as tea cup hooks)
newspaper
pencil
 
This is the wooden plaque I used.  It cost $9.99 normally at Joann's but I used a 50% coupon so got it for $5, this was my most expensive item.
 
I chose to paint mine this pretty Robin's Egg Blue.  You will only need a small bottle and you won't use too much.  You can use any left over paint you have as well.
 
Paint the plaque with at least two coats of paint.  Make sure the first coat is dry before you do the second.
 
While the paint is drying, work on your words.  You can chose whatever you want to say.  I wanted to hang both mine and my husband's bibs so I tried to keep my phrase "gender neutral".  If it were just for mine, I would have written "Run like a girl!" but, alas, you must make sacrifices for a marriage :) 
 
Choose what you want to say and type it as large as you wish and in which ever font you like.  That was the hardest for me...I couldn't decide on the font!  Print it out in landscape mode on your paper.  Make sure your paper isn't too busy or else the words will be too hard to read.
 
Cut out your words and use some of the mod podge to glue them down on your board.  Then cover your entire board in mod podge and let it dry.  I did two full coats on mine.  It was dry clear, don't worry!
 
I bought these sawtooth photo hangers at Home Depot.  They were less than $2.  I wanted to hang two on the back just in case my running bling gets heavy ;)
 
Use the level to mark where you want them to be and use a pencil to mark the holes. They come with some teeny nails and it was hard to hold them to hammer them in so I used a larger nail and made a "starter hole" so the nail could sit in it and then I hammered it in.  Make sure they are level!
 
Ta-da!  Level and ready to hang.
 
Now onto the hooks.  Some running bibs are more narrow than others and some are wider.  The race bib holders I saw on Etsy had two sets of hooks, one more narrow than the others but I decided to use the most narrow I had use that as my size.  Then I hole punched the rest of my bibs so they fit.  This way, I could put them in order of when we ran them.  On the bottom, I hung the four larger hooks for our metals.  I just evenly spaced them across the bottom.  To hang the hooks, make a small starter hole with the same nail as before and just screw them in.  The wood is fairly soft and it is easy to screw them in. Make sure your screw backs aren't longer than the wood is!
 
Once you are done with the hooks, you are finished.  It is quite easy to make and didn't take too long.  I think it looks nice hanging up and is a good inspiration to see all of them! 
 
I hope you hang yours up with pride!  We have 10 bibs hanging and 5 metals...pretty cool!  I look forward to running more races so I can add more goodies to my display.
 
Happy Crafting!


Sunday, March 10, 2013

{crazy easy} DIY felt Disney shirt!

 
Starting tomorrow Abby has spirit week at school.  Monday is "Mickey Mouse" day...and guess who doesn't have a Mickey or Minnie shirt??  Yea, Abby.  She does have some Minnie ears that Mr. Pea bought for her on a business trip to FL once, but she "couldn't wear those" because that was "embarrassing". Soooo, that got me thinking that I could probably make one!  Then this blog post was born!
 
This shirt is seriously crazy easy to make.  It took me about 15 minutes to do in total.
 
Here is what you will need:
Mickey template
Minnie bow template (for Minnie, of course!)
shirt
two colors of felt
white felt for polka dots (if you are making a Minnie)
*washable* fabric glue
Optional:
black puffy paint
*washable* sparkles
scissors, pen
 
Here are the templates that I used:

Cut out your templates and trace onto the felt with pen.  I didn't have any black so we chose pink for Minnie's head and Abby wanted blue for her bow.

Cut them out and use the glue to glue them on the shirt. Place something in between the shirt, so the glue doesn't seep through the shirt.  I used a paper bag.  Once the glue dries, you won't see it through the felt anymore.

For some added bling, I outlined the bow in black and sprinkled some washable pink glitter on it.  I also cut some small white polka dots for it as well. Let is dry flat overnight.
 
This shirt is super cute for everyday wear and can be customized for boys and girls!
 
We are actually taking our first family trip to Disneyland this fall and I know I will be making some for my kiddies to wear on our trip!!
 
Happy crafting!!

Tuesday, March 5, 2013

Spring Yarn Wreath Tutorial {and a give-a-way!}

Since it was getting a bit warmer out, I had to take down my winter yarn wreath.  It was so pretty and I was sad for a moment, until I realized what that meant...now I needed to make a new spring wreath!!  I got my supplies ready and got to work last night making this beautiful, happy spring wreath!
It was love at first sight...I wrapped the wreath in a spring green and made extra flowers to be placed on it.  After I was finished, I decided I didn't like the white wrapping around the big pink flower, but it was too late :/ But I will love it still.  I hung this wreath on the front door and it looks fab.
 
Here's what you will need to make this wreath:
 
wreath (I used a straw wreath, which gives a slightly "bumpy" feel to it, which I like for certain wreaths. Also, they are MUCH cheaper and fatter)
1-2 skeins of yarn (I used green)
Lots of felt (I used yellow, pink, orange and white for the flowers and two shades of green for the leaves)
hot glue, scissors and a piece of ribbon to hang it
 
Wrap the yarn around the wreath.  You can go around once and be sure that no wreath is showing or twice, which will use more yarn.  I wrapped once but would go back after a few inches of wrapping and re wrap any layers that had spaces.  Do you see how the wreath's edges aren't completely smooth?  This is what I mean by "bumpy".  If you use a straw wreath, leave the plastic ON.
 
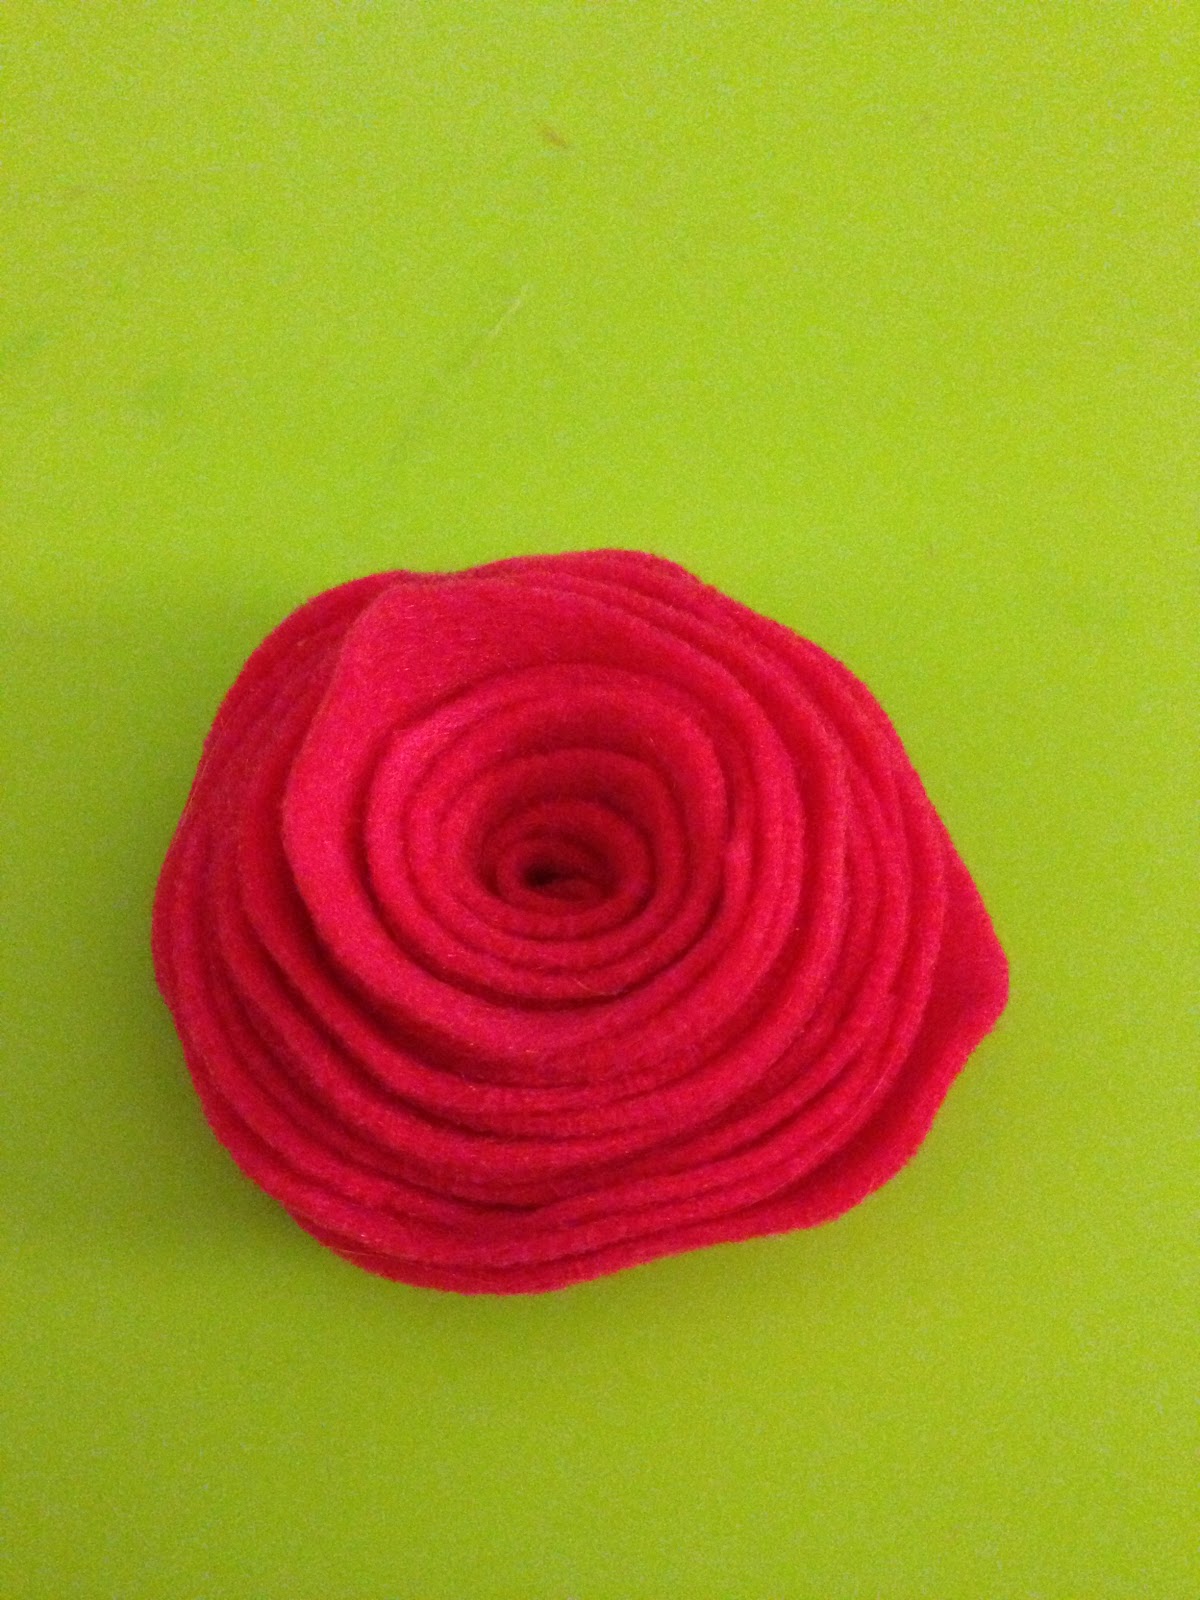
I made two different kinds of flowers, some rolled felt flowers and some "mums".  To make the rolled felt flowers, make a circle and spiral cut until you have a small circle left in the middle.  Then, hot glue and roll starting from the outermost end (not the small circle end).  The larger the circle you start with, the larger the finsihed flower!  I had a few different sizes of flower for this wreath.
 
Ta-da!  Easy and pretty. I refer to this as the "rolled felt flower".
 
To make the "mum" style, cut a strip of two inch wide felt, the longer the felt, the larger the flower.  Fold it in half and glue it together, with the glue ONLY being by the outside, not the inside by the fold.
 
Cut little slits from the fold to the outside, but not through it!
 
 
Roll and glue it, just like the rolled felt flower.  I also made a few different sizes of these as well and also made some that had a single layer of a contrasting color around the outside.
 
 
Arrange the flowers on the size how you like, gluing some leaves under the outer ones.  Tie your ribbon to the top and you are done!  I LOVE this wreath (except that dang white part which is all I keep seeing!).  It looks so nice on my front door.  We have a fairly large overhang, so I'm not worried about the rain getting it (and the fact that it hardly rains).
 
Now, onto the fun part!  I bought enough supplies to make ANOTHER spring wreath (minus that weird white part!) and I would like to share the love and give it away to one of my fellow wreath loving readers!
 
**If you would like a chance to win this gorgeous wreath (that sell on Etsy for over $40 by the way!) then SHARE this link either on Facebook or Twitter and leave me a comment below ON THE BLOG telling me you did so!  If you love me a whole lot, then feel free to share on both!!!**
 
This give-a-way will end on this Friday the 8th at 7:00pm (AZ time).  I will randomly choose a winner and announce them on Friday.
 
Good luck and happy sharing!! <3 

Sunday, February 17, 2013

And the winner is...


I am so very excited to do my first giveaway!!  This is a big step for my and my little bloggy.  I am so happy to spread my craft love with the world!

I had a few people that couldn't comment on the blog due to technical difficulties so I put everyone's name on a slip of paper and put them in a bowl and picked a winner.  I was honest, promise!!

Drum roll please.......and the winner is...

Anabelle Pearson!!

Yay, I am SO happy for you!!!  Anabelle was Abby's kinder teacher and better be Jacob's teacher this coming year. ;)  She is a fellow blogger as well. Her blog is called Keeping Up With the Pearsons and she writes about her adorable kiddies.

Now, she just needs to pick a color!

I have another giveaway in the works, so stay tuned :)  Thank you to everyone who participated!

Thursday, February 14, 2013

Pom Pom necklace and a giveaway!

 
Last night, my friend Courtney and I had a wine and crafting night and decided to try our hand making some pom pom necklaces.  Well, as luck would have it, they turned out ADORABLE!  We each made a coral and turquoise one; perfect for spring and summer.
 
I wanted to share how we made them, so all can enjoy. :)

 
Supplies needed:
fabric of choice.  (we used three fabrics per necklace, one solid and two patterns)
felt
20 in jewerly chain
wire cutters
hot glue, glue gun and scissors

 You will need to make 5 flowers per necklace.  We chose to make two of the solid, two of one pattern and one of the other.  You can mix up your patterns and colors. Crafters choice!
Cut a 2-in felt circle per flower and 10-12 fabric circles of the same size per flower.  Hot glue each fabric circle in half and then in half again so you have little triangle-shaped pieces of fabric.

 Glue four down in a circular pattern on the felt circle, the glue four on top of those and two on the very top center.  If it has any spaces, add more felt triangles so it looks nice and full.
 
When you are done, you will have a fabric pom pom! Make 5 total per necklace.  This is similar to a flower I have made for my wreaths, just done in all fabric. 

Decide on how you want your flowers to be arranged on your necklace and hot glue the chain onto the backs of your two end flowers.  We bought a 40 in chain and cut it in half with wire cutters, making sure it would be big enough to slip over our heads!  Glue all the poms onto a large piece of felt and then cut around it so that it holds the poms together, but cannot be seen when you are wearing it.
 

Ta-da!  Here I am wearing my coraly-pinkish one!  My 7 yr old took the pic so keep that in mind.  It looks super cute and very springy.
 
In celebration of our beautiful creation, I want to hold my first ever give away!!  I want to make one of these necklaces for a lucky reader. 
 
 If you would like to own one, here's how you enter:
1. Comment below ON THE BLOG, and let me know which color you would want.
2. For an extra entery, follow me on my blog by signing up to the right and then comment again letting me know you did so!  You can also spread the love by sharing this giveaway on your facebook.
This giveaway will end Sunday February 17th at 7:00pm AZ time.  Good luck!
 

Monday, February 4, 2013

Hannah's party- part one

My littlest pea had her 3rd birthday party this weekend!!

She was so excited to see her friends and jump in the jumpy castle.  Since she is only three, we decided to keep things mellow and not go too over the top.

Here are some of the treats I made for her mermaid party.  Please bear in mind I don't have a fancy camera nor any photography skills so my pictures are only so-so.  You'll get the hint, though ;)

Here is the dessert table.  I went with a pink and blue theme since these are her two favorite colors and they fit with the mermaids.

 
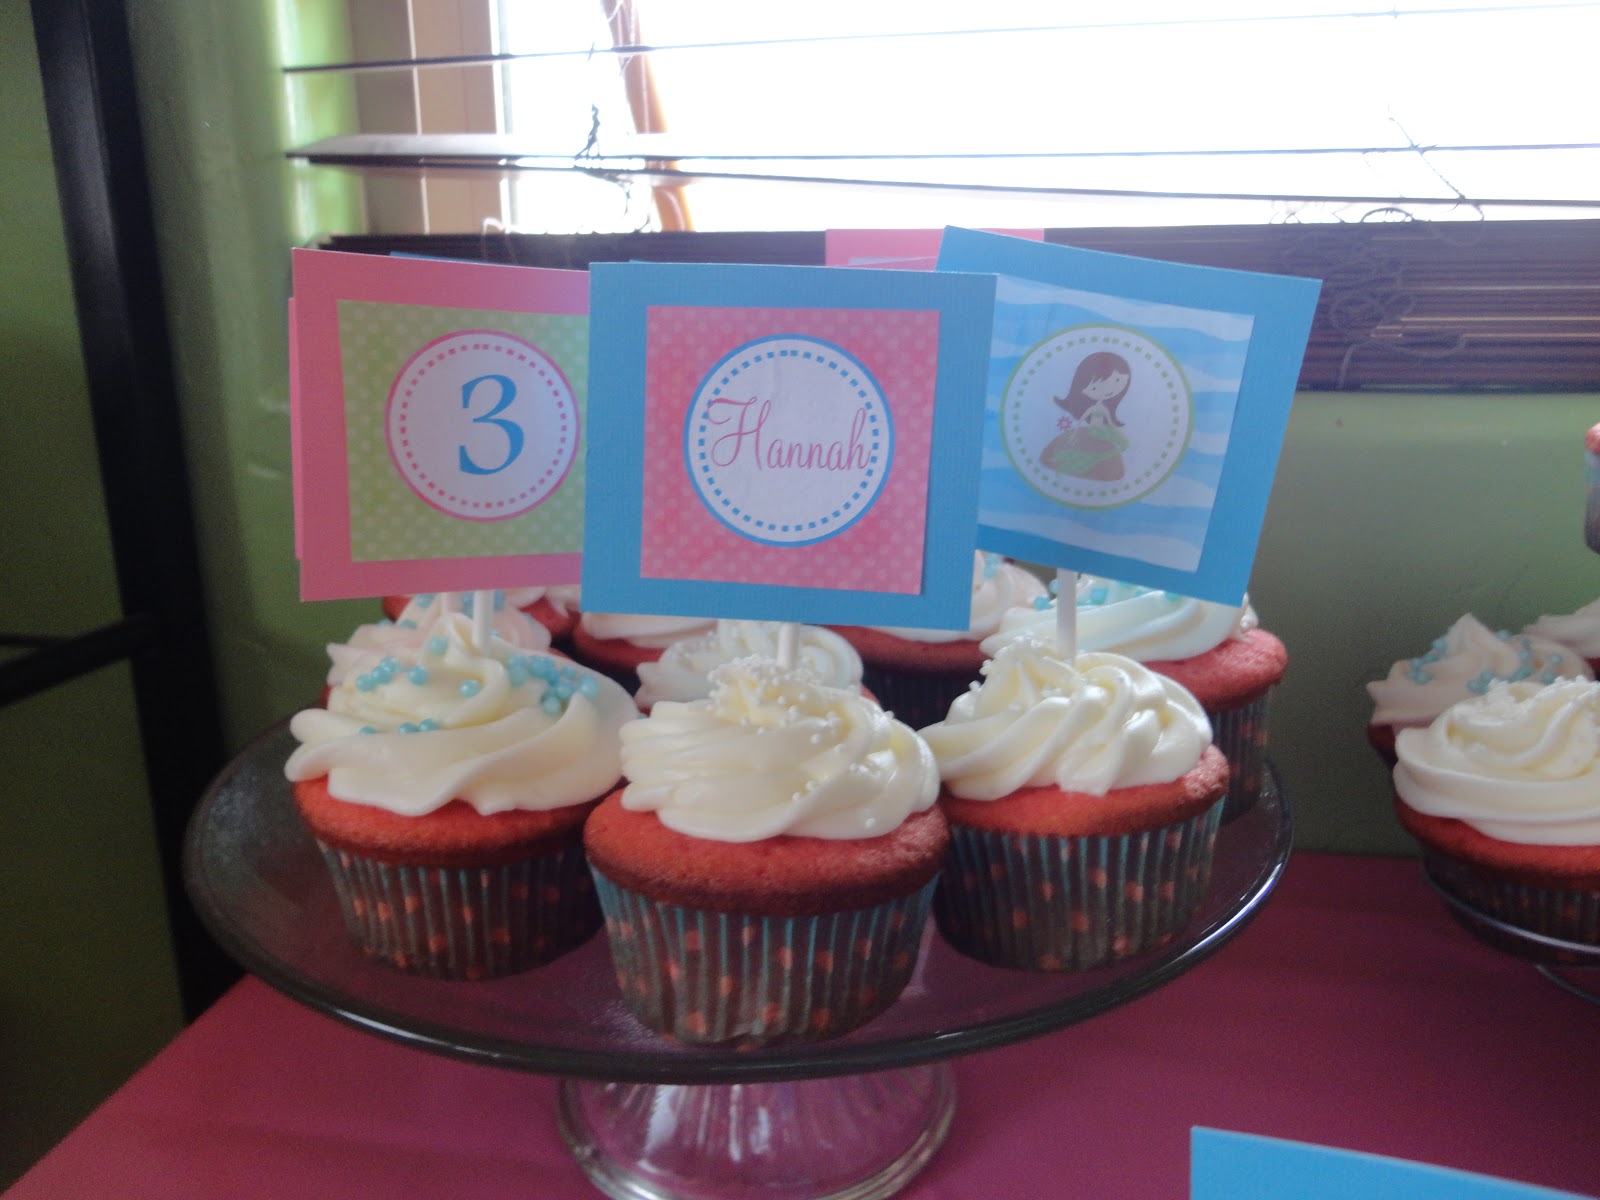
I made strawberry cupcakes with a cream cheese icing.  I purchased these cupcake toppers from a shop on Etsy and had them edited to show her name and age.  Very cute!

More cupcakes and a #3 candle, of course.

Octopus pops!!  Or, Dr. Octopus pops, like she referred to them as. (my kids are on a huge spider man kick right now) VERY easy to make and made such a cute addition to the table.  To make them, I made an 8 pointed star on wax paper with the chocolate and let it set.  I stuck the sticks in the chocolate and let them set as well.  After about 15 minutes, I dunked the mallow pops in the same pink chocolate and then placed two eye candies on them, which I just bought at Joann's, and then placed each octopus on it's tentacles.  Easy Peasy.

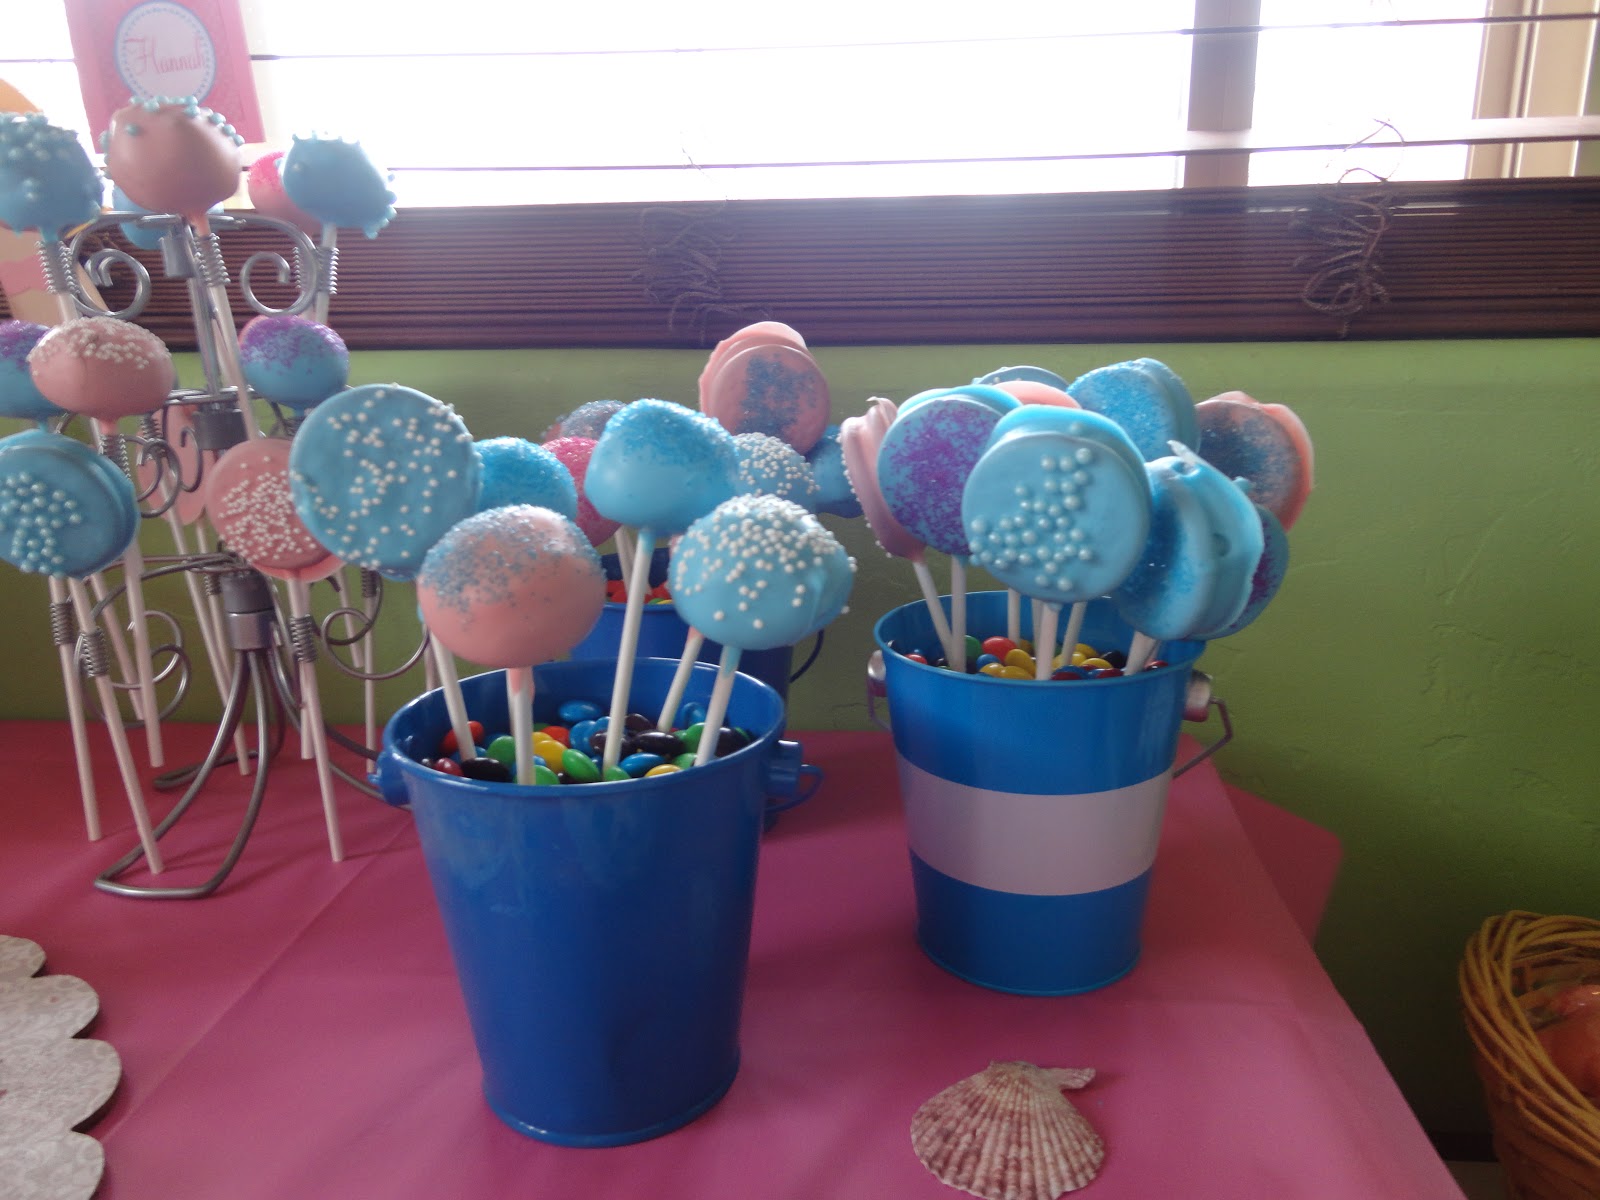
 Oreo Truffle cake pops and regular chocolate dipped oreos.  I used the same pink and blue chocolate and sprinkles for all the treats.  I used my new cake pop holder (see left of picture) to display some and then buckets for the rest.  A trick: fill the buckets up with dry beans first and then add a layer of m and m's or sprinkles for the top to display.  This saves money so you don't have to fill up the whole bucket with candy.

Chocolate ocean themed thank you pops.  I was so busy being the hostess with the mostest many people forgot to leave with these.  I think I will be reusing the remainder for part of Abby's Valentine's treats for her class :)

I made this cute sign for the center of the food table. I didn't want to go and spend a fortune on mermaid stuff from the party store so I just hand made a few. I set out some sea shells as well.

The food table.  We served fruit kabobs, fishies, chips and dip and grilled hamburgs and hot dogs.  We carried this party over to the Superbowl and brought out lots more yummy treats later.

We had beer, water, soda and capri suns outside and then pink lemonade and pink party punch (adults only) inside!  It was a fun and simple party.  She had a blast!
 
 
Here are some of the links I used for my recipes:
 
* The cupcake and frosting were my own.
* Blue jell-o fish bowls: http://www.marthastewart.com/314623/fish-bowl-gelatin?czone=holiday/sixty-days-of-summer/fun&backto=true&backtourl=/photogallery/60-summer-activities-for-kids (note: I could NOT get the fishes to "slide" in the jell-o like Martha said so mine just floated on top...a bit less attractive but relatively the same effect)
 
 
Tomorrow I will share some of the pictures of her birthday!!

Monday, January 7, 2013

Craftastic Monday

Yay!  It's Monday and back to school for Abigail.  I am happy for her to be in school, she tends to get bored quite easily at home.  It'll good for her brain to get a workout.  Back to school tomorrow for Jacob, which is also nice.  That leaves me my two morning a week with only one kiddo.  {{sigh...}}  :)

This past week, I made two different crafts that I would like to share with you!

A few friends and I are running The Color Run in Phoenix at the end of January.  It's going to be so fun!  It's a non-competitive race and only a 5k, which is easy peasy.  It's more for the fun of it.  And....what's more fun to wear during a fun race than a tutu?!?!  So my friend Courtney with "What's Up With the Wilhelm's" and her sister Breanne and I spent all of Friday in tutu-ville!  We made 7 total.  It was quite easy but a bit time consuming to make.  We ended up buying tulle by the yard since it was considerably cheaper than the rolls of it.  The idea of The Color Run is to wear all white since you get sprayed with color as you run.  We made an almost all white tutu, but put a few splashes of color, to spice it up :)
We had LOTS extra (our collective math skills appeared to fail us at the fabric counter at Joann's) so I plan on making two for my girls.  Obviously I will make the waist smaller and length of the tulle shorter for them.

I was going to give you a tutorial on how to make these adorable gems, but Courtney did an awesome one on her blog, so now I don't have to!! 

If you want to see how we made these, check out her blog here: http://wilhelmfam.com/


Adorable, eh???  We think so and cannot WAIT to rock these while we run!

The second craft I made is...wait for it....another wreath!!  Surprised??  I know, what a shocker ;)  I just love these and have been excited to work on seasonal ones to hang up during different times of the year or for certain holidays.

Since I had to put my beautiful Christmas wreath away, I NEEDED to make another one asap!  I decided to make a wintry one that can hang up for the next month or so.  Soon I can make one for St. Patty's, Easter and spring.  I'm not a fan of Valentine's day so I'll probably skip that holiday!

Here's my BEAUTIFUL winter wreath!


I love it!  I chose sparkly white yarn with a light gray.  I used some white bulbs in the background and then glued some snowflake ornaments on it.  I also made three mum felt flowers for the top.  Very pretty! 

I hope you enjoyed my crafts!  Happy Monday all!

Friday, December 21, 2012

Snowflakes for Sandy Hook


Today marks one week since last Friday's horrific tragedy in Connecticut.  I'm sure like every mother or teacher, I have felt a hole in my heart since this day.  Even though I didn't know these babies or their families, I still can't help but thinking of them everyday.  It could have been my daughter's first grade classroom.  It could've been anywhere.  It's a scary feeling. 
It was hard to put Abby on the bus the following Monday.  Not because I am worried about her at school.  She goes to an amazing school with amazing teachers and in an amazing district.  But these kids, too, went to an amazing school with amazing teachers.  This type of event, brings to light the harsh reality of how short life is; and of how quickly it can be taken away.  One of the things I would like to keep in the for front of my life for 2013, is this fact, and to really cherish every moment with my kids. 
I have prayed every day for these families.  For the families of the babies lost, for the families of the teachers and for the families of the kids that survived, since they know have had their innocence taken from them far too soon.  I pray for all of them to find peace some day. 
I didn't tell my kids about this and haven't let them watch the news about it.  I think they are just too young and I didn't want them, and especially Abby since she is the same age, to have fears going to school.  Plus, Mr. Pea and I plan on shielding them from these any all horrors as long as possible.  No child should have to know these tragedies, which is, of course, which makes this one especially difficult.  I have, however, been wanting to do something to help.  I didn't know what do to.  Then I saw this post on the blog The Handmade Home and I knew this was something that we could do.

When the kids from Sandy Hook go back to school in the new year, they will be going to a school in another town.  The Connecticut PTSA is wanting to decorate it in a winter wonderland of snowflakes for all the kids to have some joy as they attempt to progress on in their life.  They are asking for people to help make paper snowflakes to hang in the school.  I think this is wonderful idea.  Hopefully these little snowflakes sent from far away, will help remind these kids and teachers that they are not alone in their grief; that the whole country morns with them.
This afternoon, I plan on making some snowflakes with my kids to sent to Sandy Hook.  I haven't quiet decided on what I am going to say to them on WHY we are doing this.  I'll probably say something to effect of "there are some kids at a school far away that were hurt and these snowflakes are going to help to make them happy again." and leave it at that. 

If you would like to make some, here is some info on their PTSA website: http://www.ctpta.org/SANDY-HOOK-FUND.html

The address you will send them to is:
Connecticut PTSA, 60 Connolly Parkway, Building 12, Suite 103, Hamden, CT 06514, by January 12, 2013.

Here are some more places for ideas for snowflakes:
http://www.iheartnaptime.net/coffee-filter-snowflakes/

http://www.marthastewart.com/266694/decorating-with-paper-snowflakes

http://www.bhg.com/christmas/crafts/christmas-snowflake-crafts/?sssdmh=dm17.622912&esrc=nwxmascrafts2012_13_d1


I will be working on these this weekend, and pics will follow!!  I hope this small thing can bring even one smile to any of those little boys and girl's faces, because that is the least they deserve after all of the sadness they have endured.  If you make some, send me some pictures and maybe I'll make another blog showing everyone that helped!

Sunday, December 16, 2012

A Christmas Wreath and a Distraction

Tonight, I am still so sad about all these babies in Connecticut.  I can't stop thinking about them, having a daughter the same age.  I decided I needed a distraction, so I made myself a Christmas wreath.

Pretty, huh??
 
I think so!  And after making so many wreaths lately for other people, I was glad to make one for me; since I did not have a Christmas one yet.
 
I am also excited because I made a NEW flower for my wreath!  A poinsettia!  So pretty and easy to make.
 
Here's what you will need for this wreath:
 
 
- red, green and white yarn
- red and white striped bakers twine
- red, beige, and green felt
- red and white flower bulbs (I chose sparkly white and solid red)
- large wreath (I chose a straw wreath, since it's wider)
- glue gun and hot glue

A few weeks ago, I knew I wanted to make myself a holiday wreath, after I was done with the teacher wreaths.  I bought a straw wreath to make this, since it's fatter.  It is, however, not a smooth surface, so it gives a slightly "bumpy" look to the wreath, so keep that in mind.  You can choose a Styrofoam one if you'd prefer a smoother look. 

I had some left over red and white from the teachers wreathes so I used that and then got a pretty green from my friend Vanna.  It's a bit thicker of a yarn from the red and white so was quicker to wrap. 
After wrapping each color, I had some red and white striped bakers twine that I have been wanting to use so I decided to wrap that in between each section.  I forgot to take a picture of that, but you will see it in the final picture. 
To make the adorable poinsettia, I cut four strips of red felt and then cut 8 large petals, 16 medium petals and 6 small petals.  I also cut a 2 in diameter circle out of red.
After cutting the petal shape, out of all the strips, I glued the large ones down first, and the two layers of medium ones and one layer of small ones.  I cut a small beige circle to place in the center.
It's sort of hard to see the layers, but you can see it on the finished one.
I glued my beads down and then tied with some green yarn.
To make my leaves, I used two colors of green and glued them on top of one another. I hot glued these down behind the flower.
Glue the flower on top of the beads and then the leaves behind it and you are done.  I tied some green ribbon on top to hang it.
 
It's a very pretty wreath!  I'm excited to hang it in my house :)
I hope you find inspiration in my new endeavour.
Happy crafting!


Currently Linking up with "Made for you Monday" by Skip to My Lou